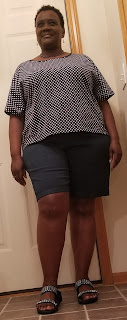
I was chosen to be a pattern tester for the Rowan Curve. I sign up to be a tester and then I get stressed out when I get the pattern and it is time to make the garment 😀.
 |
Megan Nielsen's Rowan Curve
|
How I Did It
I don't really like bodysuits because I don't have the shape for them, but I wanted to make it because of the challenge. I had never made one and I knew it would "push" me a bit in my sewing.
I have made this pattern 3 times, but am only keeping the last version because the first 2 version needed a bit more room in the bust area. After the first version why would I make the second version in the same size? Who knows 🤣.
The first and second make I used size 20 for the bust and size 24 for the waist and hip. Although it fit, I wanted a bit more width in the bust area. For the final version (third) I used size 22 for the bust and size 24 for the waist and hip.
Sewing was really easy for me except when attaching the elastic to the leg area. I tried my best to keep the elastic even with the raw edge of the fabric but it just did not work. I finally realized that if I brought the elastic in so that it was about 1/8" from the raw edge it was much easier to sew it in. After attaching the elastic I cut off the excess raw edge.
On the third make I used swimwear elastic as opposed to normal elastic and that seemed to help with inserting the elastic also.
Fabric
For the first and third versions I used the exact same ITY bought at my local fabric store specifically for this project. For the second version I used a higher end ponte knit left over fabric from a previous project purchased from Fabric Mart. Will definitely stick with ITY when I make again.
Pattern Alterations
For versions one and two I removed 2" from the length - 1" above the waist and 1" below the waist for a total of 2". When I completed version one, it was sagged in the butt area. Version one was a bodysuit and version two was a crew neck tee.
For version 3 (bodysuit) I removed 1" above the waist, 1" below the waist, and 1" in the hip area for a total of 3". The extra inch in the hip area fixed the sagging. When I attached the neckband on versions one and two I felt I had fight with stretching way too much so I used the size 24 neckband.
 |
1" Length Remove Above and Below Waistline and 1" Length Removed from Hip Area
|
Some Construction/Finished Pictures
 |
Version 2
|
 |
Version 3
|
 |
Added Knit Stay Tape to Prevent Stretching
|
Conclusion
This top is simple and fairly quick to make. I will admit I had to walk away from inserting the elastic for a day. A bodysuit is not really my style but I will wear this one.
I took me a minute to figure out why I wasn't "excited" about this make and I finally realized I prefer crew type necklines rather than turtleneck type necklines (I don't like sqeezing my head in that small neck hole 😂. Vneck for sure on the next one.
What's Next
I will be making some comfy wear from StyleArc.


Comments
Post a Comment
Enter comments here