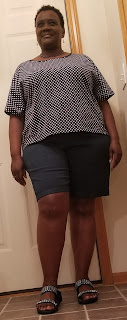
Skirt Nirvana - Cashmerette Ellis Skirt
What can I say - this skirt makes me scream with joy. This was supposed to be a muslin, but it turned into skirt nirvana. The yoke lays perfectly against my back and there is no gapping in the back of the waistband - YES!
 |
| Cashmerette Ellis Skirt |
How I Did It
This started out with the intention to be a muslin, but it fit so well there was no way I could call it a muslin - it was skirt nirvana (skirt perfection) imho 😁.
Fabric
When I saw this fabric at my local fabric store a couple of years ago I had to have it and I believe I bought all they had which was about 4 - 5 yards. It's my happy fabric because it is so colorful. It's a stretch denim.
Pattern Alterations
This really was supposed to be a muslin and one reason I chose it was because it had the yoke and the curved waistband like the jeans I made. I figured if I could get the yoke and waistband perfected on this skirt then I could translate that to my jeans pattern.
I will admit it took some time to get there, but it was well worth it. I have essentially one pair of purchased jeans that I wear. I tried them on and realized the yoke laid flat against my back. I made a pattern of the yoke and used that yoke to alter my pattern yoke
 |
| Top - Original Pattern Yoke, Bottom - Yoke Altered to Fit me |
I noted there was 1 1/4" difference between the pattern yoke and the pattern I made of the ready to wear yoke. I drew lines about 2" apart and remove the difference from the inner curve in 1/4" segments by slashing and overlapping. I was nervous because the ready to wear yoke was flat and mine was really curved, but to my surprise it laid perfectly flat against my back.
I could not use the waistband from the ready to wear because there was gaping at the back. So I did the same thing as with the yoke - made slash lines and removed 1/4' segments from the inner curve. This took some hours because I would have to make the change and stitch the band to the waist and check the fit. I had to repeat this process a number of times until I got the waistband to fit me.
 |
| Top - Original Pattern Waistband, Bottom - Waistband Altered to Fit me |
I ended up removing 2 - 1/2" (closest to center back) segments and 2 - 1/4" segments removed from the inner curve.
List of Pattern Alterations
- Removed 3" from the length
- Removed a total of 2 1/2" from the inner curve of the yoke
- Removed 3" from the inner curve of the waistband
Some Construction
Finished Pictures
Conclusion
I absolutely love this skirt - it is comfortable and cute on me 😁. It was so easy to sew and I love, love, love how they have you do the belt loops. I will be making several more of this skirt. I want to make one in a traditional denim.
What's Next
Working on another pair of jeans and still have not caught up with my postings yet.


Comments
Post a Comment
Enter comments here