Sewing Machine Cover Number 2
My word for me today. Thou wilt keep him in perfect peace, whose mind is stayed on thee: because he trusteth in thee (Isaiah 26:3 KJV).
This is part 2 of yesterdays post and the cover is for a Brother SE-400. As I shared in the previous post I made sewing machine covers for a couple of machines sold on behalf of a friend.
The biggest problem I had with the first cover was that you had to remove the cover to access the carrying handle. Another problem I had was the fit was extremely tight but it did fit. So I made adjustments to this cover to eliminate these issues.
The fabric I used was from my stash. It was denim fabric that I had gotten from my local sewing store in the home decor section. The cotton fabric I used as lining was also from my stash. I was not concerned I about matching fabric I was concerned about using my stash.
This time I used quilt batting to give the cover stability. I normally use "headliner" but did not have enough on hand for the cover.
I took ideas from a couple of different projects to create this machine cover. The projects came from one of my favorite sites that I use often - Sew4Home. The projects I used were Sewing Machine Cover with Decorative Stitching Accents and Sewing Machine Cover. This machine came with a plastic cover so I also used it as a source of inspiration.
This time I changed the serger thread to match the fabric because on the other one I had just a touch of the hot pink serger thread show in one or2 places after the seems were stitched together.


This is part 2 of yesterdays post and the cover is for a Brother SE-400. As I shared in the previous post I made sewing machine covers for a couple of machines sold on behalf of a friend.
The biggest problem I had with the first cover was that you had to remove the cover to access the carrying handle. Another problem I had was the fit was extremely tight but it did fit. So I made adjustments to this cover to eliminate these issues.
How I Did It
The fabric I used was from my stash. It was denim fabric that I had gotten from my local sewing store in the home decor section. The cotton fabric I used as lining was also from my stash. I was not concerned I about matching fabric I was concerned about using my stash.
This time I used quilt batting to give the cover stability. I normally use "headliner" but did not have enough on hand for the cover.
I took ideas from a couple of different projects to create this machine cover. The projects came from one of my favorite sites that I use often - Sew4Home. The projects I used were Sewing Machine Cover with Decorative Stitching Accents and Sewing Machine Cover. This machine came with a plastic cover so I also used it as a source of inspiration.
This time I changed the serger thread to match the fabric because on the other one I had just a touch of the hot pink serger thread show in one or2 places after the seems were stitched together.


Fabric, batting, and lining.
I used my 6D Suite embroidery software thinking I would put a name in puffy foam (this software have a couple of fonts digitized specifically for puffy foam). End the end I decided against it and went with some really fun fonts included in the software.

Below are pictures of the completed cover.

Front view. Now you can access the handle without taking off the cover.

Side view.

Back view

Other side view.

Another front view.

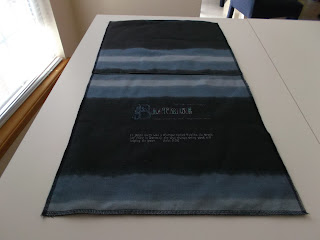
Lining view.

Side lining view.

Close up of top stitching with Sulky 12wt Blendable thread - love this thread.

Another front view.

Last front view.
I was more pleased with this version of the cover mainly because I could access the carrying handle freely and it wasn't a snug fit. Really I could have shortened the length another inch and it would have been "perfect" in my eyes. It gives the machine grown room!
I did sell a serger also and do plan to make a cover for it so stay tuned for part 3.


Comments
Post a Comment
Enter comments here